How to Teach Character Types in Middle School ELA (So It Actually Sticks)
In middle school, most students already know the terms protagonist and antagonist.
They’ve heard them for years, but their understanding often stops there.
And honestly? That’s totally fine for elementary school.
But once they hit middle school, it’s time to go deeper.
Our goal is to help students see that character types aren’t just vocabulary words. They’re the building blocks that shape every story.
Step 1: Redefine “Protagonist” and “Antagonist”
Start by challenging what they already believe.
Explain that the protagonist isn’t always “the good guy” or the hero of the story.

Sometimes, the protagonist is flawed, someone whose actions we question or disagree with (think Iron Man, Shrek, or Katniss Everdeen).
Then, show that the antagonist isn’t always the “villain.”
It can be a force instead of a person, like nature, society, technology, or even the main character’s own emotions.
When students realize that the antagonist simply represents the source of conflict, they start to think like authors instead of surface-level readers.
Step 2: Introduce Static, Dynamic, Round, and Flat Characters

Once students grasp the central conflict, it’s time to expand their view of character development.
Explain that:
Static characters stay the same throughout the story.
Dynamic characters grow or change because of what they experience.
Round characters feel real and complex because they have multiple sides.
Flat characters are one-dimensional and simple but serve a purpose.
I like to use examples from Finding Nemo to make this stick.
Static: Dory - She is forgetful and nice throughout the movie.
Dynamic: Marlin - He starts off fearful and controlling but learns to trust and let go by the end of the movie.
Round: Nemo - We see multiple sides of him: curious, rebellious, brave, and caring.
Flat: Crush - He’s the chill, laid-back turtle who helps Marlin, but we don’t learn much else about him.
The key is to help students see that authors use all of these types intentionally.
For example, a static side character might exist to highlight how the main character changes.
Connect the Dots with Visuals and Practice
Here’s where the magic happens.
Chunking is such an effective strategy when teaching notes!
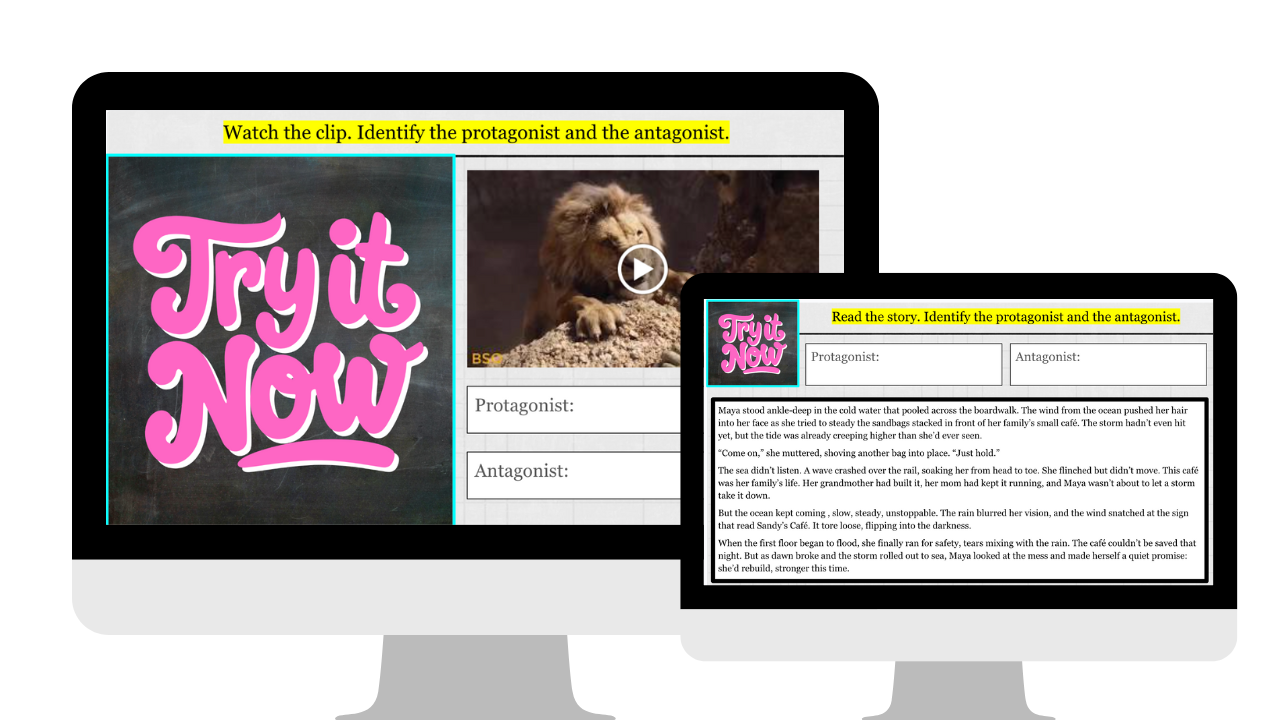
After introducing the concepts of protagonist and antagonist, I have students complete two quick practice activities to reinforce their understanding.
I like to start with a short video clip, something familiar like the “betrayal scene” from The Lion King, and have students identify the protagonists and antagonists.
Then students read a short story with their tables where the antagonist is not a character but instead a force of nature.
Then I teach the Static, Dynamic, Round, and Flat Characters part of the mini lesson.
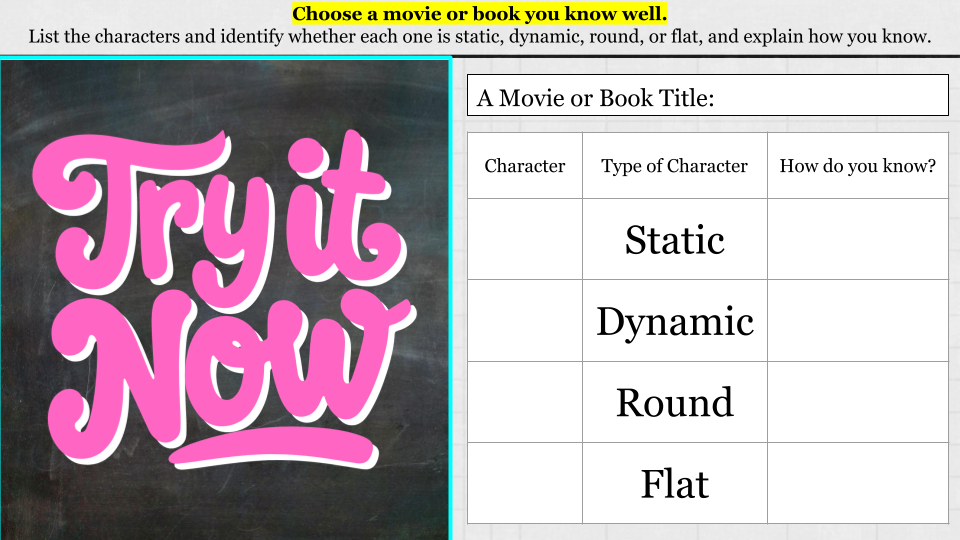
After we go over the notes and I share the Finding Nemo examples, students work together to come up with examples of each character type from a recent story we’ve read as a class.
If you haven’t read a story together yet, students can use examples from a movie they’ve watched or a book they’ve read in the past.
Once students have mastered identifying character types, I have them read a short story with a partner. After reading, they identify the protagonist and antagonist, then classify what type of characters the two main characters are.
Moving from Identification to Analysis
Once students can confidently identify different types of characters, the next step is helping them understand why the author created those characters and how they impact the plot.
The goal is to shift from What is this character? to Why does this character matter?
One of my favorite ways to do this is through the “What If” Method.
Students select one character from a story they’ve recently read and imagine that character was never introduced.
They ask themselves:
How would the story change?
Which conflicts would disappear or never begin?
What would happen to the plot or the main character’s development?
This activity pushes students to see that every character, whether static or dynamic, round or flat, plays a role in shaping the story. It helps them think like authors understanding that characters don’t just fill space, they drive meaning.
Resources to Help You Teach This
If you’re ready to bring this mini lesson to life in your classroom, here are a few resources to make it easy:
1️⃣ YouTube Character Mini Lesson Video

Watch me go over the slides and teach the full lesson step-by-step. Perfect if you want to see how I introduce each concept to students.
Click the image for the video.
This version includes everything:
✅ Teaching slides
✅ Fill-in-the-blank notes
✅ Four built-in practice activities
✅ 10-question Wayground quiz
✅ Teacher answer keys for easy grading.

3️⃣ ELA Unlimited

Get instant access to this mini lesson plus hundreds of others! Inside ELA Unlimited, you’ll find
✅ Standards Based Mini lessons
✅ Quizzes and assessments
✅ Activities and projects
✅ Classroom management tools
✅ Fresh weekly updates to help you save time and stay inspired.

4️⃣ FREEBIE:
Protagonist and Antagonist Activity Slides
A fun, ready-to-use set of slides you can use to help students practice identifying character roles and explaining how they interact in the story.