Chasing Lincoln’s Killer: Analyzing Primary Sources
Do you teach Chasing Lincoln’s Killer?
I love, love, love everything about this book! Not only is the vivid imagery amazing, but Swanson is a master of tension and suspense. We are on the edge of our seats every chapter even though we know what’s going to happen! It all comes together for a perfect book to read aloud to my middle schoolers (even my reluctant readers are engaged!)
The critical part of ensuring the engagement will happen is to build up the prior knowledge. There are so many ideas they need to understand before we start reading.
For example, what did Lincoln stand for, and why did people hate him for his policies? In their 2019 brain where there is a monument built for the guy and everything they hear is about is what an amazing leader he was for our country, my students are genuinely confused as to why someone would want to kill him. Especially someone like John Wilkes Booth who was willing to give up fame and fortune for the confederacy.
My students are also very shocked to learn about the triple assassination plot since they only know about what happened to Lincoln. We have to work on building up background knowledge about the confederacy, 1864 politics, and what murdering the top three in office would do for the Union.
After we spend a day learning about primary sources (you can get the lesson here), I start with our Primary Source Investigation!
How it works:
I have 8 stations set up around the classroom. (I outline the stations below)
When the students enter, the lights are turned off and they are given a mini flashlight. I got mine at the Dollar Tree, but you can also have your students use the flashlight setting on their phones. Turning the lights off has no academic purpose other than building engagement. Have you ever noticed when you’re watching a crime drama the investigators never turn on a light?! They always use the little flashlights. It makes me laugh and I always wonder if that’s real life. Haha!
Students rotate through the stations gathering evidence by analyzing the primary sources. They use the investigation questions we learned in the mini lesson.
After visiting all of the stations, they debrief with their group about final thoughts based on all of their evidence. Then they spend 5-10 minutes writing a reflection.
Stations:
There are SO MANY primary sources to choose from.
Most of my primary sources came from here https://artsandculture.google.com/entity/m0cvfxb unless otherwise noted.
I selected four primary sources for each station, printed them out, and glued them to red construction paper. However, you could put them in a digital collection on Google Classroom just as easily. Whatever works best for your classroom.
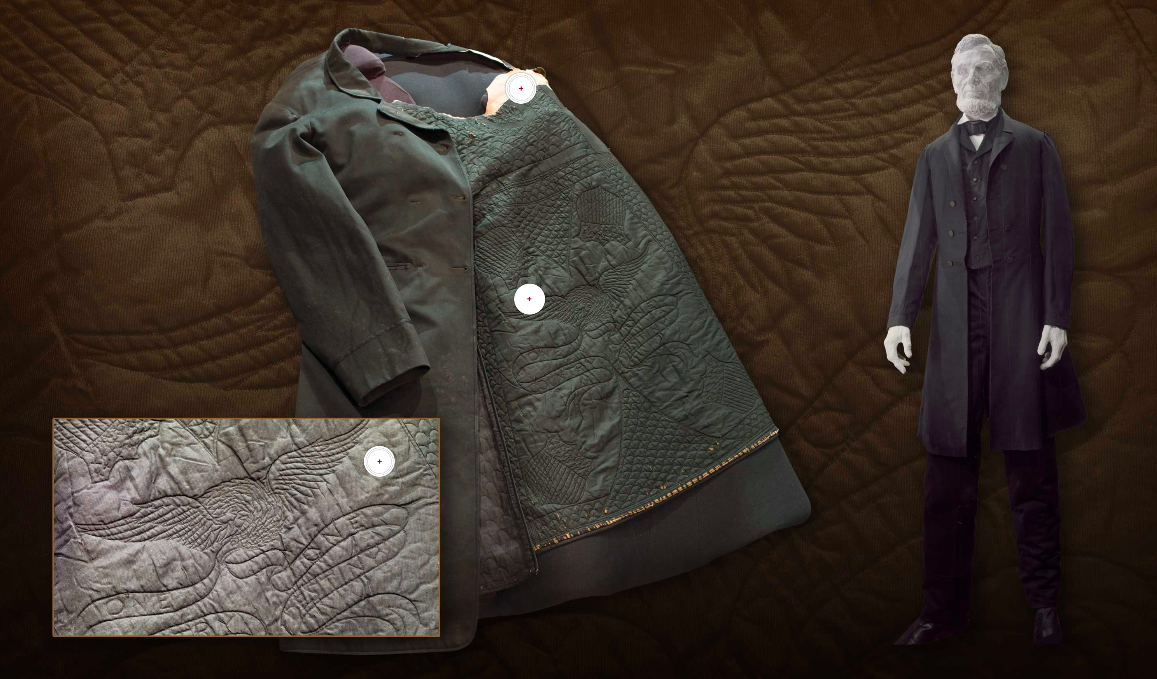
All About Lincoln: My favorite primary source in this station is a picture of the inside of Lincoln’s Coat. He had it custom made to read One Country. One Destiny. We they are going through the stations, I always make a point to pop over here each rotation to get the conversation rolling about WHY he would have that made for him and what it means. https://www.fords.org/lincolns-assassination/lincolns-clothes/

2. John Wilkes Booth: With this station I really want them to focus on how he carries himself, his looks, and demeanor in his photographs. There is always one in the group that calls him a player since he was carrying photos of multiple girlfriends.
3. The co-conspirators: This station is usually the first time students realize John Wilkes Booth did not work alone. My favorite from this station is the Wanted poster that’s included in the book. The students love to make guesses as to how much money it would be today. I copied the pictures from the book for this station, but they are also available from the link above.
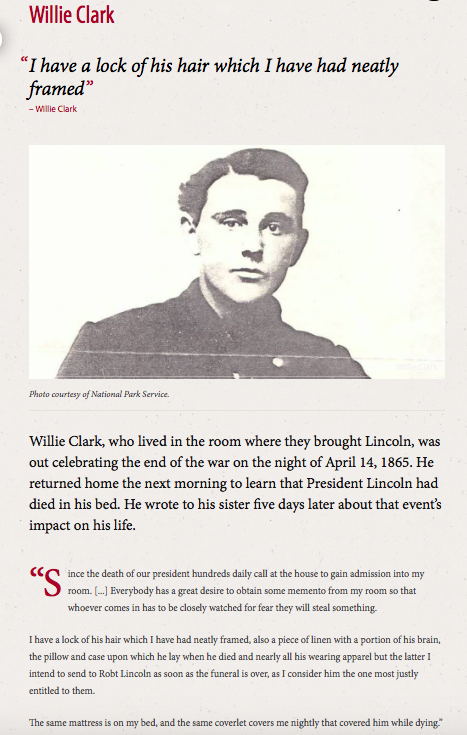
4. First Hand Accounts: The account the students find the most interesting is Willie Clark. Even though Lincoln died in his room at the Peterson House, he continued to stay there sleeping on the same mattress and using the same blankets that covered Lincoln. He even kept a piece of linen with a portion of his brain! Kids just love that detail! https://www.fords.org/lincolns-assassination/lincolns-death/ Click on First Hand Accounts in the red box on the left hand side.

5. Map of Responses: I really want students to recognize the similarities and differences with how different states reported the news. I pop over to this station to talk about if states report the news differently, and to see if they are surprised by any of the news coverage. http://rememberinglincoln.fords.org/exhibit/places
6. Public Reactions: These are great diary entries and letters students can read to gain understanding about how the pubic felt about Lincoln’s death. http://rememberinglincoln.fords.org/exhibit/people

7. Artifacts: There are so many to choose from! The highlight at this station is always Booth’s weapons. They are amazed at how small the gun was! They also notice how it is a one shot pistol.

8. Artist Depictions: I made copies of the prints included in the book. The students really like the one where the devil is whispering to Booth. They think it’s creepy, and it’s a good segue to talk about mood of images and artist’s intent.
This activity takes two full days to complete, but it’s worth the time investment. It really builds up their background knowledge for when we start reading.
Let me know if you try it, or if you have anything special you do prior to teaching Chasing Lincoln’s Killer! I am always looking for new ideas!
Happy teaching,
Savannah